
An AI avatar is a stylized picture based on your face. It can work as a profile picture, gaming handle, or channel icon. It is not a realistic photograph. For a realistic photo, see our guide to AI headshots that look real.
What Is an AI Avatar?
An avatar starts with a photo and changes the art style. The result may keep your face shape, hair, glasses, or expression, but it is drawn, sculpted, flattened, or rendered. It is built to be read at small size.
A realistic headshot tries to look like a normal photograph. It preserves skin detail, lighting, and background. An avatar removes most of that detail. The goal is likeness plus style.
Common avatar styles include cartoon, anime, a 3D clay render look, flat vector, watercolor, and pixel. If the output becomes a generic face, it lost the likeness. If it becomes a photo, it missed the style.
Which Photo Should You Use as the Source for an AI Avatar?
Start with a photo that shows your face clearly. The model needs enough features to work with, but it does not need a perfect portrait.
Use a photo with one person only, a clear front or slightly turned face, even light, few shadows, a plain background, and a recognizable expression. Do not use heavy filters, masks, or large sunglasses unless they are a required part of your look.
Use your own photo or a photo you have rights to. If the person is not you, get permission. Do not use someone else's face without consent.
A casual selfie can work. A busy scene can confuse the output. A low quality photo can create muddy shapes.
If you need the same avatar across many images, see how to create consistent characters with AI image generators.
How Do You Turn a Photo Into an AI Avatar With an Image Edit Tool or Midjourney?
There are two paths. One uses a normal image edit feature in a chat or image tool. The other uses Midjourney Omni Reference.
Option A, image edit with a reference photo
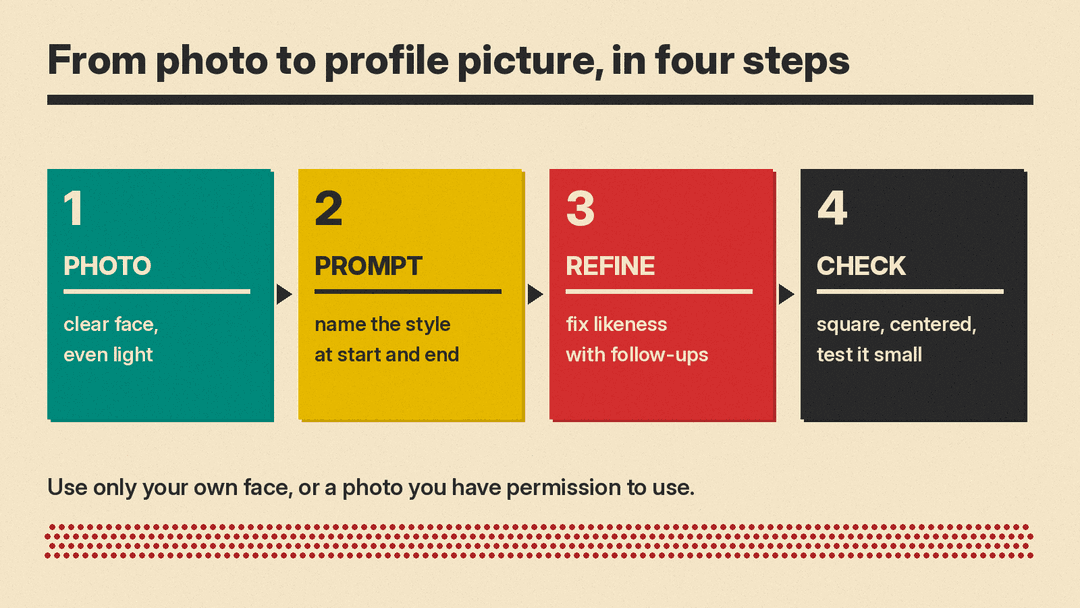
If your tool has an edit feature, upload the source photo, then ask for a stylized avatar. Name the style, keep the likeness, request a centered face, and ask for a simple background.
In the OpenAI API, according to the OpenAI image generation guide, the Edits endpoint modifies existing images using a new prompt. It can take several input images as references. The guide's example combines four reference images into one new image. For an avatar, one clear photo is usually the starting point. The Generations endpoint creates an image from text, so it is better when you do not need a specific face.
The output can set size, such as 1024x1024, quality, format, and background. Background options include transparent, opaque, or automatic. A square output helps later cropping.
If the first output is close but wrong, do not start over every time. The Responses API supports multi-turn editing, so you can iteratively refine an image with follow-up prompts. Ask for small changes.
Option B, Midjourney Omni Reference
According to Midjourney's Omni Reference docs, Omni Reference puts characters, objects, or creatures from a reference image into new images. It works with Midjourney version 7. For V8.X, Midjourney recommends its Edit Model, which supports up to four reference images. Omni Reference uses only one image.
On Discord, add --oref plus the image URL. The weight parameter --ow ranges from 1 to 1,000, with a default of 100. Midjourney says keep it below 400 unless using a very high stylize value. A lower weight lets the style change more, but then you need to describe the features you want kept in the text prompt.
Omni Reference costs 2x GPU time compared with regular version 7 images. Midjourney says you must have rights to images you upload. It also says not to manipulate images of people in abusive ways, including sexualized deepfakes.
For a different style, Midjourney advises naming the style at both the start and the end of the prompt. Its example is "Illustration of a young woman with short gray hair drawn by a comic book artist." Do not expect fine details such as freckles or logos on clothing to match perfectly.
What Prompt Template and Example Prompts Work for Avatar Styles?
Use one short template. Put the style, likeness, output size, background, and exclusions in the prompt. Do not add a long biography.
Create a [STYLE] avatar of the person in the reference photo.
Keep the facial structure recognizable.
Center the head and show only the head and a small part of the shoulders.
Use a simple [PLAIN BACKGROUND] background.
Use a square output, such as 1024x1024.
Avoid extra clothing details, logos, jewelry, text, watermarks, or background objects.
For Midjourney Omni Reference, add the style at the start and end of the prompt, and include the reference flags in the command. For other edit tools, attach or upload the photo and use the prompt above.
Cartoon
Create a clean cartoon avatar of the person in the reference photo. Keep the face recognizable. Use bold outlines, flat color fills, and a friendly expression. Place the head centered on a plain single color background. Avoid logos, jewelry, and text.Anime
Create an anime avatar of the person in the reference photo. Keep the face recognizable. Use large clear eyes, simplified nose lines, clean line art, and soft color. Center the head on a plain background. Avoid logos, jewelry, and text.3D clay render look
Create a 3D clay render avatar of the person in the reference photo. Keep the face recognizable. Use rounded clay surfaces, matte color, soft light, and simple shapes. Center the head on a plain background. Avoid logos, jewelry, and text.Flat vector
Create a flat vector avatar of the person in the reference photo. Keep the face recognizable. Use simple shapes, solid color, no heavy shading, and clean edges. Center the head on a plain background. Avoid logos, jewelry, and text.Watercolor
Create a watercolor avatar of the person in the reference photo. Keep the face recognizable. Use light pigment, paper texture, soft edges, and simple color washes. Center the head on a plain paper background. Avoid logos, jewelry, and text.Pixel
Create a pixel avatar of the person in the reference photo. Keep the face recognizable. Use a small pixel grid, limited colors, clear outlines, and a plain background. Center the head so it reads at small size. Avoid logos, jewelry, and text.If you want a stronger pixel workflow, see make pixel art with AI.
How Do You Make an AI Avatar Work as a Profile Picture?
Profile pictures are shown small, and many apps crop them to a circle. Corners, shoulders, and background objects can get cut away.
Export a square first. A 1024x1024 output is a practical square size. Center the face. The top of the head should not touch the edge. The chin should not be cut off.
Use a simple background. If the tool allows a transparent background, use it when the platform supports it. If not, use opaque or automatic and choose a plain color.
Check the avatar at small size. View it on a phone. If the eyes and face shape are not clear, make a new version. Ask for a larger head, simpler clothing, and no background objects.
Before you upload, preview a circle crop to see what stays visible. Keep text out. An icon rarely needs words.
How Do You Fix Common AI Avatar Problems?
The output does not look like you. Use a clearer source photo. Ask for "same facial structure" and list stable features, such as "long oval face, short black hair, round glasses." If using Midjourney Omni Reference, change --ow carefully. The default is 100. Midjourney says keep it below 400 unless using a very high stylize value. Lower values let style change more, so describe the features you want kept.
The avatar has extra details. Add exclusions. Say "avoid logos, jewelry, text, and background objects." If the model adds clothing, ask for head and shoulders only. If the model adds scenery, say "plain background only."
The style is too weak. Name the style at the start and end of the prompt. That is the style pattern Midjourney gives. For an image edit tool, try stronger style words, such as "thick cartoon outlines" or "flat vector shapes."
The background is busy. Ask for a single-color background, paper background, or transparent background. The OpenAI image generation guide lists background options: transparent, opaque, or automatic. A busy background hurts a profile icon because platforms crop tightly.
The face is cut off. Ask for a centered head, with the whole face visible and small space around the head. If needed, crop manually after output.
What Are the Rules for Privacy and Consent When Making an AI Avatar?
Use only your own photo or a photo you have rights to use. If the person is not you, ask permission before editing the photo. Do not use someone else's face to imply endorsement, mock, shame, or harm them. Do not create sexualized or abusive images.
Midjourney says you must have rights to images you upload. It also says not to manipulate images of people in abusive ways, including sexualized deepfakes. A stylized avatar can still be misuse if it uses a real person's face without consent. Avatars of people who have died raise the same question, as the backlash to the 2wai grief avatar ad shows.
A drawn face can still carry your identity, so treat a public avatar like any other photo of you. If a photographer or employer owns the source photo, check that you may use it.
AI Avatar FAQ
What source photo is easiest to use? A clear photo of your face with even light, one person, and a simple background. A front facing selfie is a good start.
Can I keep my glasses or hairstyle? You can ask for it, but use plain words. "Keep the glasses" is better than a long description. The more stable features you name, the easier it is for the model to follow.
Can I use more than one photo of myself? In some tools, yes. The OpenAI image generation guide says Edits can take several input images as references. Midjourney's Omni Reference takes one image, while its Edit Model supports up to four reference images.
