
A mood board is a visual collection that defines the feel of a project before any actual design work begins. It typically includes images, textures, typography samples, color palettes, and descriptive words. While traditional mood boards rely on manual curation from magazines or online searches, AI tools can now help build them.
AI assists in three primary ways. First, it fills gaps with generated images you cannot find through standard search engines. Second, some tools can draft an entire board structure based on a text description. Third, in advanced workflows, the finished board can steer subsequent image generation so that later assets match the established look. This guide walks through the process step by step, for designers, small business owners, event planners, students and marketers.
What Goes On a Mood Board?
Before generating anything, understand the components of a strong mood board. Canva describes a mood board as a collection of images, textures, typography, color palettes and description words. It is not just a random collage. It requires specific elements to be effective.
The core components include:
- Images: Photos that capture the desired atmosphere, lighting, or subject matter.
- Textures: Close-ups of materials like wood, fabric, paper, or metal.
- Typography: Font styles that reflect the tone, whether modern, classic, or playful.
- Color Palette: A selection of dominant and accent colors.
- Description Words: Adjectives that summarize the vibe, such as "minimalist," "rustic," or "energetic."
These elements work together to create a cohesive visual language. If one element feels out of place, the board loses its utility as a guide for future design decisions.
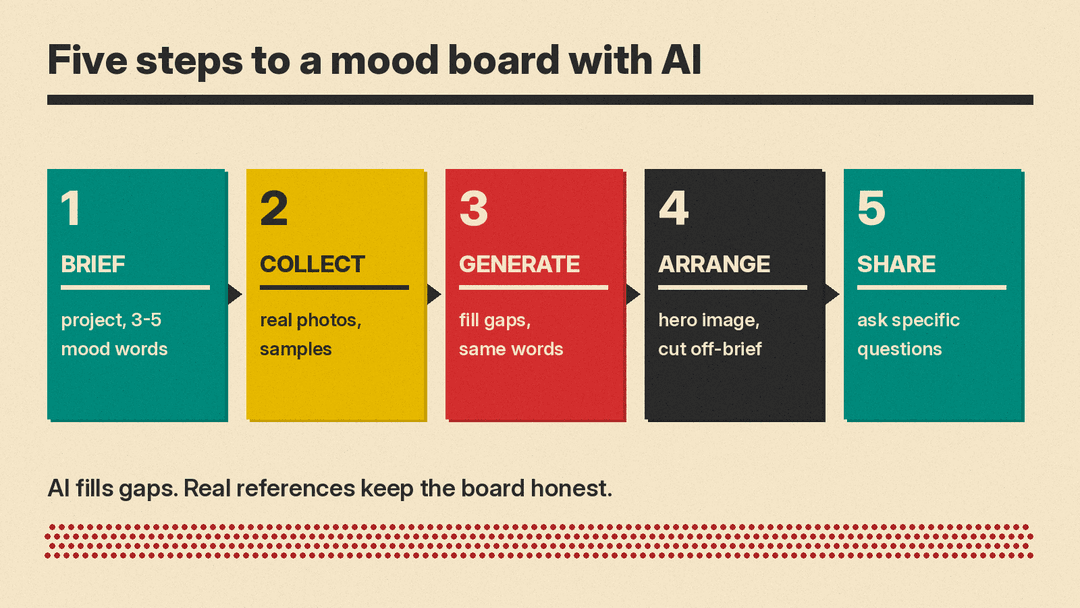
Step 1: Write a One-Paragraph Brief First
AI tools require clear instructions to produce useful results. You cannot simply ask for a "good looking board" without context. Start by writing a brief paragraph that outlines your project.
Include these details in your brief:
- The project type (for example, wedding invitation suite, startup landing page).
- The target audience.
- Three to five mood words (for example, calm, trustworthy, organic).
- Colors to use and colors to avoid.
- Any existing references or brand guidelines.
This written brief serves two purposes. It helps you clarify your own vision, and it provides the necessary keywords for AI prompts. Without this foundation, AI-generated content will likely be generic or inconsistent. For guidance on crafting precise descriptions, see our article on how to write AI image prompts.
Step 2: Collect Real References Before Generating
A common mistake is relying entirely on AI to create every asset. AI should fill gaps, not replace reality. Gather real-world references first. These might include photos you took at a venue, fabric swatches, product shots, or examples of past successful work.
Real references ground the mood board in physical constraints and authentic textures. They also help you evaluate whether AI generations are actually matching your intent. If you generate a texture but have no reference for what the final material looks like, you may end up with an unrealistic expectation. Use your collected references to anchor the board, then use AI to expand upon them.
Step 3: Generate the Missing Pieces
Once you have your brief and real references, identify what is missing. Do you need a background texture? A specific lighting effect? A color gradient? Use AI to generate these specific tiles.
Here are four example prompts for board tiles:
- Texture close-up: "Macro shot of linen fabric texture, soft natural light, beige and white tones, high detail."
- Lighting reference: "Interior scene with warm golden hour sunlight streaming through window blinds, cozy atmosphere, muted colors."
- Color swatch scene: "Abstract composition of overlapping translucent shapes in sage green, terracotta, and cream, smooth gradients, minimalist style."
- Material detail: "Close up of brushed brass metal surface next to matte black stone, industrial chic, sharp focus."
Keep the same mood words and palette descriptions in every prompt. This consistency ensures the individual tiles look related when placed side by side. If you change the style mid-process, the board will look disjointed. Pay attention to technical settings like aspect ratio if your tool allows it, as discussed in our guide on AI image settings like seed and aspect ratio.
How Different Tools Handle AI Mood Boards
Different platforms offer distinct features for creating mood boards. Here is how three widely used tools approach the task.
Canva
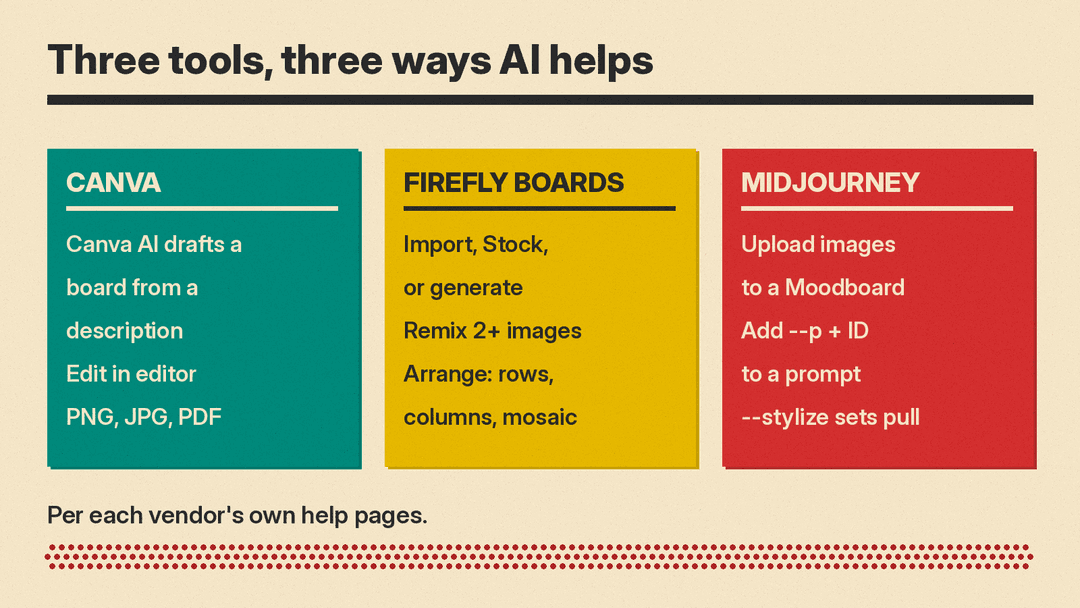
Canva says Canva AI can generate moodboards from the Canva homepage. Per Canva's mood board page (Italian edition), the process involves describing your theme, style, and colors. The system may ask clarifying questions before building a board that includes a palette, materials, reference images, and captions.
You can edit the generated board in Canva’s drag-and-drop mood board editor. Templates are available if you prefer starting with a structured layout. Note that AI features consume credits included in your plan. Once finished, you can download the board as PNG, JPG, or PDF.
Adobe Firefly Boards
Adobe Firefly Boards is built for collecting and arranging. To start, select Boards in Firefly and then Create new board. You can import your own images, search Adobe Stock, or use the Generate image feature to pick from Firefly and partner models.
Key features include:
- Remix: Select two or more images to generate new variations inspired by them.
- Arrange: Organize items into rows, columns, or mosaics.
- Collect: Group items into an artboard.
- Multimedia: Add shapes, text, and video clips.
You can invite people by email with edit or comment permission, or copy a link to the board. This makes it easy for teams to collaborate on the visual direction.
Midjourney Moodboards
Midjourney treats moodboards as a form of personalization. On the Moodboards page, choose New Moodboard, name it, and add images via upload, URL, or from your gallery. Each board has a unique ID.
To use a board, add --p followed by the ID to your prompt. This applies the style of the board to new generations. You can also set boards as defaults using the Personalization button. The --stylize value controls how strongly the board's style influences the output, ranging from 0 to 1000 with a default of 100.
Midjourney says a board remixes images in more complex ways as you add more diverse images. Boards update as you add or remove images, and codes made from a board keep working even after you delete it. However, you cannot combine moodboard personalization with style reference versions or style weight parameters.
Step 4: Arrange and Edit the Final Layout
Generating images is only half the work. You must curate the final arrangement. Place one hero image that best captures the overall vibe. Group remaining items by role, such as color swatches, textures, typography, and environmental shots.
Review every tile against your initial brief. Cut anything that does not fit, even if the image itself is beautiful. Off-brief elements dilute the message. Add a visible color palette strip and list your three to five key mood words clearly. Keep the entire board within one screen view if possible. This forces brevity and clarity, making it easier for stakeholders to grasp the concept quickly.
If your project requires logo integration, check any AI-generated logo for readability and for close resemblance to existing marks. Refer to our step-by-step guide on how to design a logo with AI for more specific advice on branding elements.
Step 5: Share and Get Feedback
Mood boards are communication tools. Share them early to get alignment before detailed design work begins. Use the sharing features built into your chosen platform. For example, Adobe Firefly Boards lets you invite collaborators with comment permission instead of edit permission, so they can leave feedback without editing the board.
Ask specific questions when seeking feedback. Instead of asking "Do you like it?", ask "Does this convey the feeling of luxury?" or "Is the color palette too dark for our audience?" Specific questions yield actionable insights.
Common Mistakes to Avoid
Even with AI assistance, several pitfalls can ruin a mood board.
- Too many images: Clutter makes it hard to identify the core theme. Stick to essential visuals.
- Mixing styles: Combining photorealistic images with flat illustrations can blur the direction unless you mean to show both.
- Only AI images: Relying solely on generated content can drift away from the real materials, venue or product. Mix in real references.
- Bad generated text: Image generators can misspell words or garble lettering. Always manually verify any text included in the board.
- Rights issues: Be cautious about using generated images that resemble copyrighted characters or brands. General caution is advised regarding commercial use rights.
The Board Is a Decision Tool
A mood board is a decision tool, not final art. Its purpose is to align everyone involved in a project on the visual direction before resources are spent on detailed execution. AI speeds up the creation of individual assets and helps visualize concepts quickly, but human judgment remains essential for curation and coherence. By combining a clear brief, real references, and targeted AI generation, you can build mood boards that guide the design work that follows.
