
AI image tools can also work on a photo you already have: remove a stray object, swap a background, widen a shot that was framed too tight, or turn a few product photos into a new scene.
This guide covers three kinds of edit: inpainting, outpainting and image-to-image. It explains what each one means in plain English, how the steps look in a real tool, and some habits to try for cleaner results.
The walkthroughs below come from Adobe's Photoshop help pages for Generative Fill and Generative Expand, and from OpenAI's image generation guide, which documents how image edits and masks work in its API. Other apps use different button names. To compare editors that offer these edits, see our best AI photo editors guide. For a wider look at the tools, see our roundup of the best AI image generators as of October 2026.
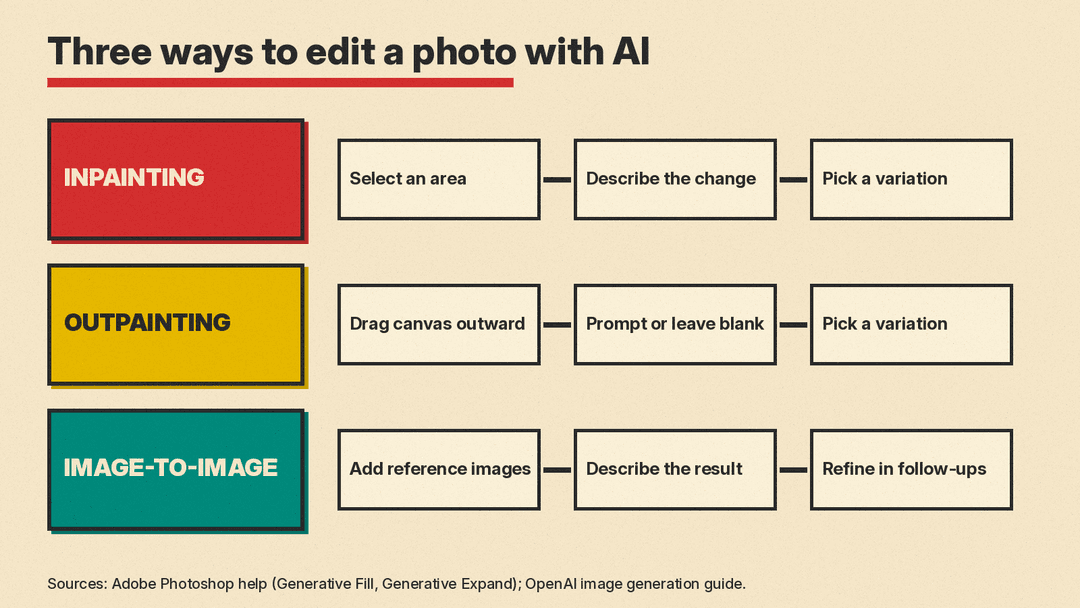
The three kinds of AI photo edit
Inpainting: change one part of the picture
Inpainting means editing a chosen area inside an image while keeping the rest. You mark the part you want to change, then tell the tool what should go there. Typical uses:
- Remove a person, sign or power line from the background.
- Replace an object, for example a plain mug with a patterned one.
- Add something that was not there, such as a plant on an empty shelf.
In Photoshop this feature is called Generative Fill. OpenAI's guide describes the same idea as editing "parts of an image by uploading an image and mask that identifies the areas to replace."
Outpainting: extend the picture past its edges
Outpainting adds new content outside the original frame. It is useful when a photo is too tight for the shape you need, such as a portrait shot that has to become a wide banner, or a product photo that needs empty space for text.
In Photoshop this is Generative Expand. You make the canvas bigger, and the tool fills the new area so it matches the original scene.
Image-to-image: use pictures as the starting point
Image-to-image means giving the model one or more images as input and asking for a new image based on them. The result can be a restyled version of the same photo, or a new scene built from several references.
OpenAI's guide gives an example: four separate product photos (a body lotion, a soap, a bath bomb and an incense kit) go in, along with a prompt asking for a photorealistic gift basket "containing all the items in the reference pictures." One new image comes out. Some image models are built around this kind of edit; our Krea 3 explainer covers one that edits from several reference images.
How inpainting works, step by step
Here is the Generative Fill flow as Adobe documents it for Photoshop on desktop:
- Open your image.
- Select the area you want to change. Adobe suggests a selection tool such as the Selection Brush.
- Choose Generative Fill.
- Pick a model. Photoshop shows a model picker in its Contextual Task Bar, with Adobe Firefly models and partner models from other companies.
- Type a prompt, or leave it blank. Describe what should appear in the selection. If you leave the prompt empty, Photoshop fills the selection using the surrounding pixels.
- Select Generate, then pick a variation from the Properties panel.
Adobe says Generative Fill alters an image non-destructively.
Tips for cleaner inpainting
- Select a little more than the object. Include its shadow and a thin margin around it, then check the edges of the result.
- Remove first, add second. If you want to replace a chair with a lamp, you can clear the chair with a blank prompt, then add the lamp in a second pass.
- Describe only what goes in the selection. Adobe's steps ask you to describe what should appear in the selection, so describe the lamp (for example, a green ceramic lamp on the table), not the whole room.
- Generate a few versions. Photoshop shows variations in the Properties panel. Compare them at full size before you choose.
How outpainting works, step by step
Adobe's Generative Expand steps in Photoshop are short:
- Select the Crop tool and drag the crop handles outward to make the canvas bigger.
- Select Generative Expand from the Contextual Task Bar.
- Choose a model in the model picker.
- Leave the prompt blank and select Generate to let Photoshop extend the image, or add a prompt if you want something specific in the new area.
- Pick a variation from the Properties panel.
Tips for natural-looking outpainting
- Extend in small steps. A bigger new area means more content the model has to invent, so you may prefer two smaller expansions to one large one.
- Watch straight lines. Check that horizons, table edges, floor tiles and walls continue at the same angle.
- Try a blank prompt for plain backgrounds. For sky, sand, grass or a studio backdrop, start with Adobe's default step: a blank prompt that lets Photoshop extend the image.
- Plan for text space. If the goal is a banner or thumbnail, extend on the side where the headline will sit.
How image-to-image works
Image-to-image is less about one button and more about a way of working. You give the tool pictures plus words, and it produces a new image based on them.
OpenAI's guide says its image edits endpoint lets you, among other things:
- Edit an existing image.
- Generate a new image using other images as a reference.
- Edit parts of an image using an image and a mask.
Its guide also describes multi-turn editing, where you refine an image across follow-up messages. In OpenAI's example, the first request makes a picture of a gray tabby cat hugging an otter in an orange scarf, and the follow-up simply says "Now make it look realistic."
Tips for image-to-image
- Say what must stay the same. For example: "Keep the product, its label and its color exactly as they are. Change only the background to a sunny kitchen counter."
- Name each reference. When you upload several images, say what each one is for: "Use the first image for the product and the second for the lighting style."
- Change one thing per turn. In a chat-style editor, ask for one small step at a time (warmer light, then a shadow under the bottle), so you can see what each request changed.
- Start a new session when it drifts. If repeated edits slowly change things you wanted to keep, go back to the original image and try again.
What a mask is, and why it matters
A mask is a second image that marks which part of the photo the AI may change. In an app like Photoshop, your selection does this job. If you work with an API or a more technical tool, you may make the mask file yourself.
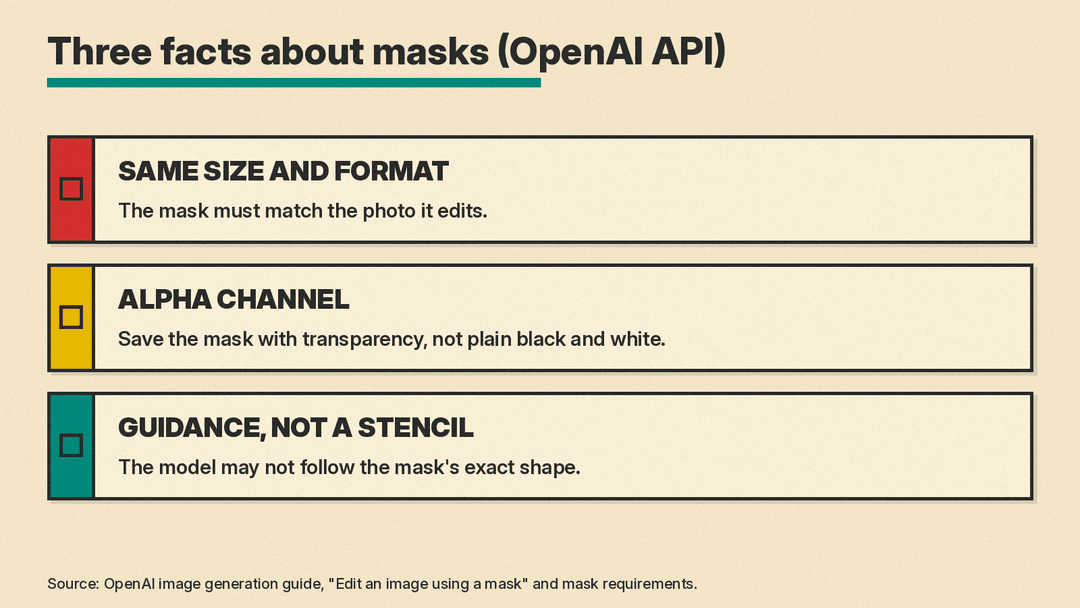
OpenAI's guide lists a few rules for masks in its API:
- Same size and format. The image and the mask must match in format and size.
- Alpha channel. The mask must contain an alpha channel, which is the transparency layer of an image file. A plain black and white file is not enough on its own. The guide includes a short script that converts one.
- Guidance, not a stencil. OpenAI says masking with its GPT Image models is "entirely prompt-based" and that the model "may not follow its exact shape with complete precision."
So with GPT Image models, a mask guides where the model edits rather than marking an exact boundary. Check the edges and any fine detail near the edited area.
Where AI photo edits still go wrong
OpenAI's guide lists limits of its own image models:
- Text. The guide says the model "can still struggle with precise text placement and clarity." Check every word on signs, labels and packaging after an edit.
- Consistency. It notes the model may "occasionally struggle to maintain visual consistency for recurring characters or brand elements across multiple generations." If you edit a series of photos of the same person or product, compare them side by side.
- Exact placement. It also says the model "may have difficulty placing elements precisely in structured or layout-sensitive compositions." For precise layouts, place elements by hand in a design tool after the AI step.
A few more things to check:
- Hands, faces and fingers near the edited area.
- Shadows and reflections that point the wrong way or are missing.
- Repeated patterns in grass, bricks or fabric that look copy-pasted.
- Resolution. Zoom in to make sure the new area is as sharp as the rest of the photo.
Editing photos honestly
Editing a holiday snap is one thing. Changing a photo of a real person, or an image that others will treat as a record of an event, is another. A few common-sense rules:
- Ask before you edit other people. Do not change how someone looks, or place them somewhere they were not, without their permission.
- Do not present an edited image as an untouched one in news, evidence, reviews or listings where buyers expect a true picture.
- Keep your original file. It is your record of what the camera actually captured.
- Use provenance labels where you can. Photoshop's help pages include a section on exporting your work with Content Credentials.
A simple routine to follow
If you want one checklist to keep:
- Keep a copy of the original.
- Decide which edit you need: change a part (inpainting), add space (outpainting) or build something new from references (image-to-image).
- Select generously, and prompt only for what goes in the selected area.
- Generate several variations and compare them at full size.
- Check text, edges, hands, shadows and straight lines.
- Make one change at a time, and restart from the original if things drift. Adobe Research's EditAgent paper reports a similar result: candidates made from the original image beat repeated re-editing of the previous result.
- Be honest about edits when the image will be shared as a real photo.
