
A storyboard turns a script into a row of pictures, so everyone on a project can see the plan before anyone picks up a camera. For a long time that meant drawing, or paying someone who could. AI image tools change that part. Anyone who can describe a shot can now get a rough frame for it in a minute or two.
What AI does not change is the planning. The tool can draw a close-up of a hand on a coffee cup, but it cannot decide whether your video needs that shot. This guide walks through a simple process: plan the shots yourself, then use AI to draw them, then lay them out so the board is useful to the people who will shoot and edit.
What is a storyboard?
StudioBinder's storyboard guide defines a storyboard as a visual representation of a film sequence that breaks the action into individual panels, laid out like a comic book. It calls the board a trial run for the finished film, video or commercial.
The same guide lists the elements a board usually carries:
- Image panels or illustrations
- Scene descriptions
- Shot numbers
- Arrows that show movement
- Timing information
- Notes and annotations
Only the first item is a picture. The rest is planning information, and that is the part AI cannot do for you. Keep that in mind as you work: the frames are there to make the notes easier to understand.
What AI is good at, and where it struggles
AI image generators are useful for storyboards for three reasons. They are fast, so you can try several versions of a shot. They let people who cannot draw show composition and mood. And they make it easy to test a look, such as warm daylight versus cool night, before you commit.
They also have limits, and the vendors say so. OpenAI's image generation guide notes that its model may occasionally struggle to keep recurring characters or brand elements consistent across generations, may have difficulty placing elements precisely in layout-sensitive compositions, and can still struggle with precise text placement.
Those three limits matter for storyboards, because a board is a sequence of frames with the same people, in planned positions, often with labels. The process below works around them:
- Keep the same character wording and a reference image for every panel.
- Describe framing in plain camera terms instead of asking for exact positions.
- Keep text out of the images. Add shot numbers, dialogue and arrows in the layout instead.
Step 1: Write a shot list first
Before you open any image tool, write the shot list. StudioBinder's guide makes a similar point: before you draw panels, read the scene and work out what it needs to do, because that informs your shot choices and camera movement.
For each shot, write down:
- Shot number
- Shot size (wide, medium, close-up)
- Camera angle (eye level, high angle, low angle, over the shoulder)
- Action: what happens in the frame
- Dialogue or sound
- Rough duration
Here is an example for a 30-second video about a small coffee roaster:
- Shot 1, wide, eye level: the roastery at dawn, lights coming on. Sound: roaster starting up. About 4 seconds.
- Shot 2, close-up, high angle: green coffee beans pouring into the roaster. About 3 seconds.
- Shot 3, medium, eye level: the roaster, a woman in a canvas apron, checks a handful of beans. About 5 seconds.
- Shot 4, close-up, low angle: dark roasted beans tumbling in the cooling tray. About 4 seconds.
- Shot 5, medium, over the shoulder: a customer receives a bag of coffee across the counter. Line: "Roasted this morning." About 6 seconds.
- Shot 6, wide, eye level: the shop front with the logo, end card space. About 8 seconds.
A list like this is already most of the storyboard. The pictures will just make it faster to read.
Step 2: Lock a character and style sheet
Write one short paragraph for each recurring character and one for the overall look. Then copy that exact wording into every prompt. Changing even a few words between prompts invites the tool to change the character.
Example character line: "a woman in her thirties with short curly black hair, round glasses, a canvas apron over a grey t-shirt."
Example style line: "loose pencil storyboard sketch, grey wash shading, white background, simple lines."
A plain sketch style is a good default. It reads as a plan rather than finished art, and it hides small differences between frames better than a photo-real style does. If you want a different look, our guide to describing an art style in a prompt covers how to name one clearly.
Next, generate one reference image of each main character and keep it. Many tools accept reference images. OpenAI's guide says you can give one or more images as references when generating a new image, and Midjourney's Edit model documentation describes generating new images from up to four reference images. Feeding the same reference into each panel helps keep the character steady. For more techniques, see our guide on creating consistent characters with AI image generators.
Step 3: Write one prompt per panel
Use a template so every prompt has the same parts in the same order:
[shot size] [camera angle] of [character description] [action] in [setting], [lighting], [style], [aspect ratio]
Set the aspect ratio to match the final video, for example 16:9 for a widescreen video or 9:16 for a vertical one. Frames in the wrong shape mislead everyone about what will fit in the shot. Our explainer on AI image settings covers aspect ratio and seed in more detail.
Three example prompts for the coffee video above:
- Shot 1: "Wide shot, eye level, of a small coffee roastery at dawn, lights switching on, large roasting machine in the center, soft blue morning light through the windows, loose pencil storyboard sketch, grey wash shading, white background, simple lines, 16:9."
- Shot 3: "Medium shot, eye level, of a woman in her thirties with short curly black hair, round glasses, a canvas apron over a grey t-shirt, holding a handful of coffee beans up to inspect them next to a roasting machine, warm work light, loose pencil storyboard sketch, grey wash shading, white background, simple lines, 16:9."
- Shot 5: "Medium shot over the shoulder of a customer, looking across a wooden counter at a woman in her thirties with short curly black hair, round glasses, a canvas apron over a grey t-shirt, handing over a paper bag of coffee, warm shop light, loose pencil storyboard sketch, grey wash shading, white background, simple lines, 16:9."
Notice what is missing: no text, no logos, no lines of dialogue in the image. Those go in the layout.
Step 4: Fix panels by editing, not regenerating
When a frame is close but wrong, edit it rather than starting over. A fresh generation can change the character, the setting and the framing all at once. An edit changes one thing.
Most current tools offer some form of this. OpenAI's guide describes multi-turn editing, where you refine an image across several turns of a conversation. Midjourney's documentation describes changing an existing image with written instructions, editing a selected area (inpainting), and extending the canvas beyond the frame (outpainting).
Change one thing per edit: "move the camera lower," "make her look at the beans, not the camera," "remove the second person." If a frame still will not come right after a few tries, accept a rough version and add a note under it. A storyboard only has to be clear, not perfect.
Step 5: Lay out the board
You do not need special software. A slide deck, a shared document or a spreadsheet with images works. Dedicated storyboard tools add templates and shot fields if you want them.
StudioBinder's first step is choosing a presentation format. Its guide says simple sketches suit many panels per page, while larger, detailed frames suit a pitch to clients or investors. Pick one and keep it.
Under each frame, add:
- Shot number and shot size
- What happens (one sentence)
- Dialogue or sound
- Camera movement, drawn as an arrow on top of the frame if it moves
- Duration
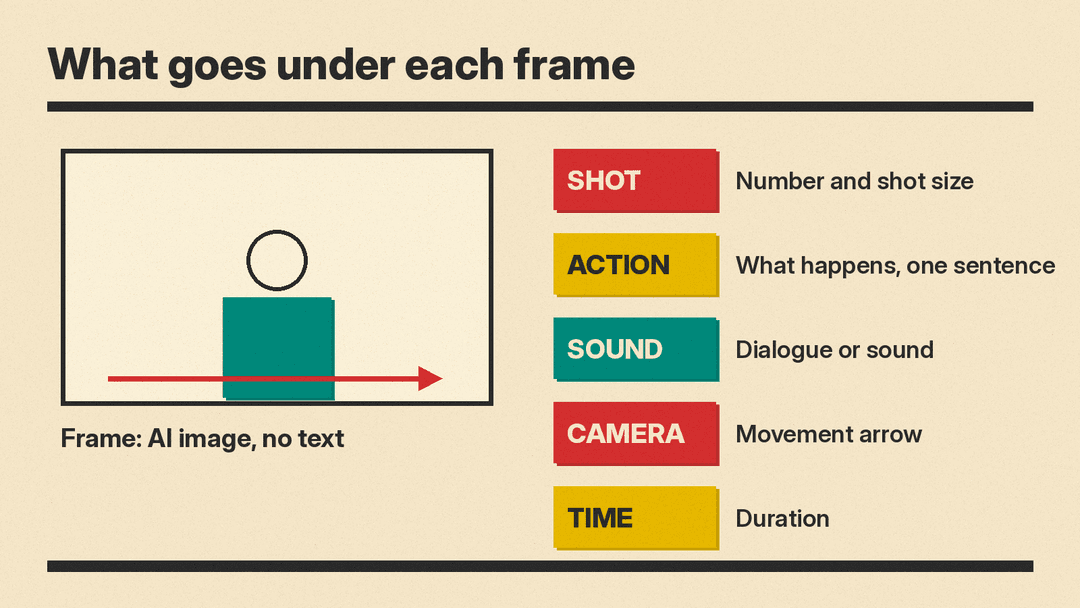
This is where the text you kept out of the images goes. Text you type is exact. Text an image model draws may not be.
Step 6: Review, then update as the plan changes
Share the board with whoever will shoot, edit or approve the video, and ask them to comment on shots, not on drawing quality. Questions worth asking:
- Does each shot do a job in the story?
- Is anything missing between two shots that would confuse a viewer?
- Can each shot actually be filmed with the location, people and gear you have?
- Do the durations add up to the length you need?
When the plan changes, change the shot list first, then replace only the frames that are affected. Because your character and style wording is fixed, a new frame should sit next to the old ones without looking out of place.
Common mistakes
- Skipping the shot list. Generating images first and building a story around them leads to pretty frames that do not cut together.
- Too much detail. Busy, photo-real frames pull attention to set dressing instead of framing and action.
- Mixed styles. Changing the style words between panels makes the board look like several projects.
- Text inside the image. Labels drawn by the model can come out garbled. Type them in the layout.
- Treating frames as final art. A storyboard is a plan. The finished video will look different, and that is expected.
A note on rights and sharing
Before you use AI frames outside your own team, for example in a client pitch, read the terms of the tool you used. Each service sets its own rules on how you may use what it generates. If a board will be shown publicly, say that the frames were made with AI.
Summary
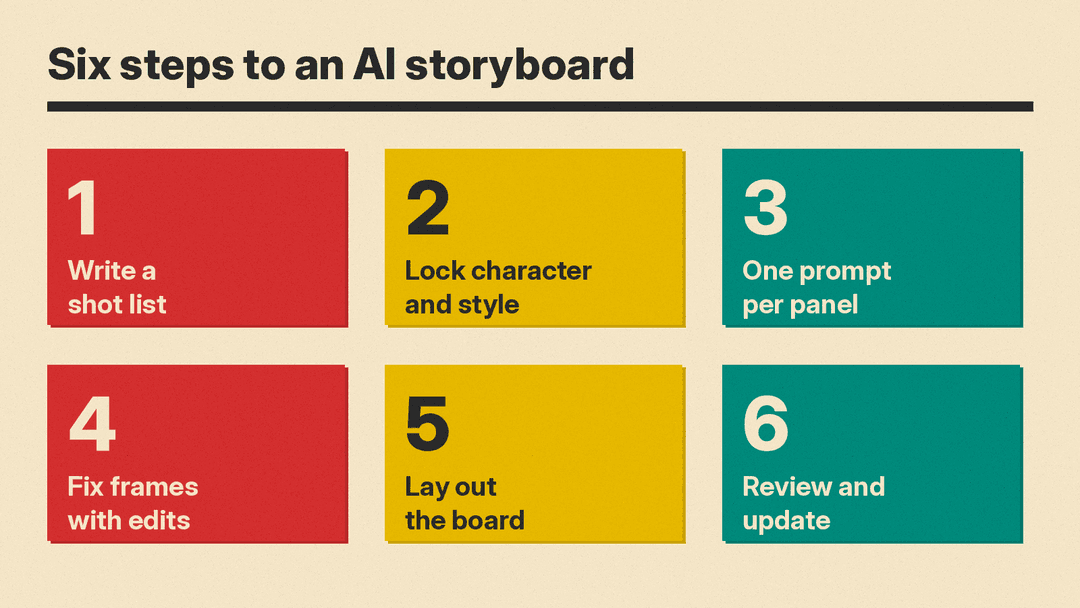
The method is short: write the shot list, lock your character and style wording, use one templated prompt per panel, fix frames with edits, then lay the board out with typed notes under each frame. The AI saves drawing time. The shot list, the order and the notes are still yours, and they are what make a storyboard useful.
